Bella  Recip
  • Home
  • Beef
  • Recipes
  • Features
    • Lifestyle
    • Sports Group
      • Category 1
      • Category 2
      • Category 3
      • Category 4
      • Category 5
    • Sub Menu 3
    • Sub Menu 4
  • Chicken

 Introduction

What are Loaded Beef Nachos? Simply put, they're a fiesta on a plate! This delectable dish features crispy tortilla chips topped with savory ground beef, melted cheese, and a variety of fresh toppings. Nachos have become a staple at parties, game nights, and casual gatherings due to their versatility and irresistible flavor.


Loaded beef nachos stand out as a favorite because they combine the crunch of chips with the heartiness of beef, all under a blanket of gooey cheese. Whether you're hosting a big event or just looking for a quick and satisfying meal, these nachos hit the spot every time.

Ingredients

Creating the perfect loaded beef nachos requires the right ingredients. Here's what you'll need:

Main Ingredients

  • Tortilla chips: The base of any good nacho dish. Choose sturdy chips that can hold up to all the toppings.
  • Ground beef: The star protein. Opt for a lean variety to keep it from becoming too greasy.
  • Cheese: Shredded cheddar, Monterey Jack, or a blend of your favorites.
  • Avocado: Diced or sliced, adds a creamy texture.
  • Black olives: Sliced, for a tangy, briny bite.
  • Green onions: Chopped, for a mild onion flavor.
  • Tomatoes: Diced, for a fresh, juicy contrast.
  • Sour cream: For drizzling on top.

Optional Ingredients

  • Jalapenos: For those who like it hot.
  • Black beans: For added protein and fiber.
  • Corn: Adds a sweet crunch.
  • Cilantro: For a burst of freshness.


Directions

Preparation Start by prepping all your ingredients. Dice the avocado and tomatoes, slice the olives and green onions, and get your cheese shredded. Preheat your oven to 375°F (190°C).

Cooking the Beef In a skillet over medium heat, cook the ground beef until browned. Season with your favorite taco seasoning or a mix of cumin, paprika, garlic powder, and salt. Once cooked, drain any excess fat and set aside.

Assembling the Nachos On a large baking sheet or oven-safe platter, spread out a layer of tortilla chips. Top with half of the cooked beef and sprinkle with cheese. Add another layer of chips, beef, and cheese. This layering ensures that every chip gets some delicious toppings.

Baking Place the assembled nachos in the preheated oven. Bake for about 10-15 minutes, or until the cheese is fully melted and bubbly. Keep an eye on them to prevent burning.

Final Touches Once out of the oven, add your fresh toppings: diced tomatoes, avocado, black olives, and green onions. Drizzle with sour cream and add any optional ingredients you like.

Serving Suggestions

Loaded beef nachos are perfect on their own, but they can also be part of a larger spread. Serve them with salsa, guacamole, and extra sour cream on the side. As for beverages, a cold beer or a refreshing margarita pairs wonderfully with nachos.

Tips and Tricks

  • Crispy Nachos: To keep your nachos crispy, layer them on a wire rack over your baking sheet. This allows air to circulate and prevents sogginess.
  • Preventing Soggy Nachos: Make sure your ingredients aren't too wet. Pat dry any ingredients like tomatoes and olives before adding them.
  • Customizing: Don't be afraid to get creative! Try adding pulled pork instead of beef, or use a blend of different cheeses for a unique flavor profile.

Nutritional Information

While loaded beef nachos are definitely a treat, it's good to know what you're eating. On average, a serving of nachos can range from 300 to 500 calories, depending on the toppings. They provide a good amount of protein from the beef and cheese but can be high in fat and sodium.

For a healthier alternative, consider using baked tortilla chips, lean ground turkey, and reduced-fat cheese. You can also pile on more veggies to boost the nutritional value.

 Introduction

The West Village White Wine Chicken is a delightful and elegant dish, perfect for a sophisticated dinner or a cozy night in. This recipe features succulent chicken pieces cooked in a fragrant white wine sauce, complemented by aromatic herbs and garlic. The result is a tender, flavorful chicken dish that pairs beautifully with a variety of sides.


Ingredients

  • 4 chicken breasts, skin-on
  • 1 cup white wine
  • 1/2 cup chicken broth
  • 6 cloves garlic, peeled and halved
  • 2 sprigs fresh rosemary
  • 2 sprigs fresh thyme
  • 2 tablespoons olive oil
  • Salt and pepper to taste
  • Fresh parsley, chopped (for garnish)

Directions

  1. Prepare the Chicken: Preheat your oven to 375°F (190°C). Season the chicken breasts with salt and pepper.

  2. Sear the Chicken: In a large oven-safe skillet, heat the olive oil over medium-high heat. Add the chicken breasts, skin-side down, and sear until golden brown, about 5 minutes. Flip the chicken and sear the other side for another 3 minutes.

  3. Add Aromatics: Add the garlic, rosemary, and thyme to the skillet, nestling them around the chicken.

  4. Deglaze with Wine: Pour in the white wine and chicken broth, scraping up any browned bits from the bottom of the skillet.

  5. Bake: Transfer the skillet to the preheated oven and bake for 25-30 minutes, or until the chicken is cooked through and reaches an internal temperature of 165°F (74°C).

  6. Serve: Remove the chicken from the oven and let it rest for a few minutes. Garnish with fresh parsley before serving.

Enjoy your flavorful West Village White Wine Chicken with a side of your choice, such as roasted vegetables, mashed potatoes, or a simple green salad.

 Introduction

Fajitas are a classic Tex-Mex dish, perfect for a quick and delicious meal. This recipe is simple to prepare, using a variety of colorful bell peppers and tender strips of beef, all cooked together in one skillet. Serve with warm tortillas and a squeeze of fresh lime for a satisfying dinner.


Ingredients

  • 1 lb beef steak, cut into thin strips
  • 1 red bell pepper, thinly sliced
  • 1 yellow bell pepper, thinly sliced
  • 1 green bell pepper, thinly sliced
  • 1 onion, thinly sliced
  • 2 tbsp olive oil
  • 1 tsp chili powder
  • 1 tsp cumin
  • 1/2 tsp garlic powder
  • Salt and pepper to taste
  • 8 small flour tortillas
  • Lime wedges for serving

Directions

  1. Prepare the ingredients: Slice the beef steak into thin strips. Cut the bell peppers and onion into thin slices.
  2. Cook the beef: In a large skillet, heat 1 tablespoon of olive oil over medium-high heat. Add the beef strips and cook until browned, about 5-7 minutes. Remove from the skillet and set aside.
  3. Cook the vegetables: In the same skillet, add the remaining tablespoon of olive oil. Add the sliced bell peppers and onion. Cook until the vegetables are tender, about 5-7 minutes.
  4. Season and combine: Return the cooked beef to the skillet with the vegetables. Add the chili powder, cumin, garlic powder, salt, and pepper. Stir to combine and cook for an additional 2-3 minutes until everything is heated through and well-seasoned.
  5. Serve: Warm the flour tortillas in a dry skillet or microwave. Serve the fajita mixture with the warm tortillas and lime wedges on the side.

 Introduction

What if I told you that you could have a delicious, nutritious meal ready in just 20 minutes? Say hello to the 20-minute taco salad! This dish combines all the flavors you love in tacos, but with a healthier twist. Whether you're looking for a quick lunch, a light dinner, or something to impress your guests, this taco salad is the way to go.


Ingredients Overview

Before we dive into the detailed recipe, let’s take a quick look at the main components that make this taco salad a hit. We’ll need fresh vegetables, a protein source, some tasty toppings, and a dressing to bring it all together.

Fresh Vegetables

The base of our taco salad is packed with fresh veggies. Think crisp lettuce, juicy tomatoes, creamy avocado, and crunchy cucumbers.

Protein Options

You can customize your taco salad with your favorite protein. Ground beef is a classic choice, but chicken, turkey, or a vegetarian option like black beans or tofu works great too.

Toppings and Dressings

No taco salad is complete without delicious toppings and dressings. Cheese, olives, tortilla strips, and a zesty dressing will elevate your salad to the next level.

Detailed Ingredient List

Here’s a detailed list of everything you’ll need for your 20-minute taco salad.

Vegetables

  • 1 head of romaine lettuce, chopped
  • 1 cup of cherry tomatoes, halved
  • 1 avocado, diced
  • 1 cucumber, diced
  • 1/2 red onion, thinly sliced

Protein

  • 1 pound of ground beef (or your choice of protein)
  • 1 tablespoon of olive oil
  • 1 packet of taco seasoning

Toppings

  • 1 cup of shredded cheddar cheese
  • 1/2 cup of black olives, sliced
  • 1/2 cup of tortilla strips
  • Lime wedges for garnish

Dressings

  • 1/2 cup of ranch dressing
  • 1/4 cup of salsa


Preparation Steps

Let’s get started with preparing our ingredients.

Preparing the Vegetables

First, chop all your vegetables. Make sure the lettuce is clean and crisp. Halve the cherry tomatoes, dice the avocado and cucumber, and thinly slice the red onion.

Cooking the Protein

Heat the olive oil in a skillet over medium-high heat. Add the ground beef and cook until browned, about 5-7 minutes. Drain any excess fat and stir in the taco seasoning. Cook for another 2 minutes, then set aside.

Assembling the Salad

Now that everything is prepped, it's time to assemble your taco salad. In a large bowl, combine the chopped lettuce, tomatoes, avocado, cucumber, and red onion. Add the cooked ground beef on top.

Step-by-Step Directions

Chopping and Prepping Vegetables

  1. Lettuce: Wash and chop the romaine lettuce into bite-sized pieces.
  2. Tomatoes: Halve the cherry tomatoes.
  3. Avocado: Dice the avocado.
  4. Cucumber: Dice the cucumber.
  5. Red Onion: Thinly slice the red onion.

Cooking Ground Beef or Vegetarian Alternatives

  1. Heat Oil: In a skillet, heat the olive oil over medium-high heat.
  2. Cook Beef: Add the ground beef and cook until browned.
  3. Season: Drain excess fat and add taco seasoning. Cook for another 2 minutes.

Mixing and Matching Toppings

  1. Combine Veggies: In a large bowl, mix the lettuce, tomatoes, avocado, cucumber, and red onion.
  2. Add Protein: Top with cooked ground beef.
  3. Toppings: Sprinkle shredded cheese, black olives, and tortilla strips.
  4. Dress: Drizzle with ranch dressing and salsa. Serve with lime wedges.

Time-Saving Tips

Efficient Chopping Techniques

Use a sharp knife and chop in bulk. Store pre-chopped veggies in the fridge for quick assembly.

Pre-Cooking Protein

Cook and season your protein in advance. Store in an airtight container for up to three days.

Using Ready-Made Dressings

Opt for store-bought dressings if you're short on time. They’re convenient and taste great.

Nutritional Benefits

This taco salad is packed with nutrients. Fresh vegetables provide vitamins and fiber, while the protein keeps you full. Cheese and avocado add healthy fats.

Customization Options

Alternative Proteins

Try chicken, turkey, tofu, or black beans for a different twist.

Vegetarian and Vegan Options

Skip the meat and add more beans or tofu. Use dairy-free cheese and vegan dressing.

Gluten-Free Adjustments

Ensure your taco seasoning and tortilla strips are gluten-free.

Serving Suggestions

Pairing with Side Dishes

Pair your taco salad with a side of Mexican rice or a bowl of tortilla soup.

Best Beverages to Accompany

Serve with iced tea, lemonade, or a cold cerveza.

Storage and Leftovers

Proper Storage Techniques

Store leftovers in an airtight container in the fridge. Keep the dressing separate to prevent sogginess.

Reheating Tips

Reheat the protein separately and assemble the salad just before eating.

Frequently Asked Questions

Can I Make This Salad Ahead of Time?

Yes! Prepare all the components and store them separately. Assemble just before serving.

What Are Some Low-Calorie Dressing Options?

Try a light vinaigrette or a homemade yogurt-based dressing.

How Can I Make This Salad Spicier?

Add sliced jalapeños or a spicy salsa.

Can I Use Different Types of Cheese

Introduction

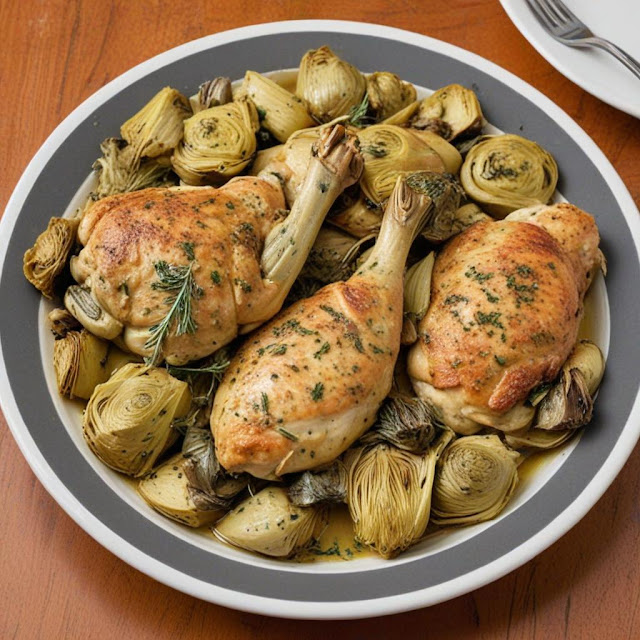
Astoria Artichoke Chicken is a delectable dish that has found its way into the hearts of many food enthusiasts. This savory recipe combines tender chicken with the earthy flavors of artichokes, creating a meal that is both nutritious and satisfying. Perfect for special occasions or a cozy family dinner, Astoria Artichoke Chicken is sure to impress with its unique blend of ingredients and flavors.


Ingredients

To create this delightful dish, you will need the following ingredients:

  • Main Ingredients:

    • 4 boneless, skinless chicken breasts
    • 2 cups of fresh or canned artichoke hearts, quartered
    • 2 tablespoons of olive oil
    • 1 cup of chicken broth
    • 1 lemon, juiced
    • 3 cloves of garlic, minced
  • Spices and Herbs:

    • 1 teaspoon of dried thyme
    • 1 teaspoon of dried rosemary
    • Salt and pepper to taste
  • Optional Ingredients for Variations:

    • 1 cup of cherry tomatoes, halved
    • 1/2 cup of black olives, sliced
    • Fresh parsley for garnish

Preparation Time

Creating Astoria Artichoke Chicken is a straightforward process that doesn't require extensive time in the kitchen. The total time required is approximately 45 minutes, with 15 minutes of active preparation and 30 minutes of cooking time.

Nutritional Information

Astoria Artichoke Chicken is not only delicious but also packed with nutrients. Here’s a breakdown of its nutritional content:

  • Caloric Content: Approximately 350 calories per serving
  • Macronutrients Breakdown:
    • Protein: 30g
    • Carbohydrates: 10g
    • Fat: 18g
  • Vitamins and Minerals:
    • Rich in Vitamin C from lemon juice
    • High in fiber from artichokes
    • Good source of iron and potassium


Step-by-Step Directions

Preparation of Ingredients

  1. Cleaning and Trimming Artichokes:

    • If using fresh artichokes, remove the tough outer leaves and trim the stems. Cut the artichokes into quarters and remove the choke.
  2. Marinating the Chicken:

    • In a bowl, mix the olive oil, lemon juice, minced garlic, dried thyme, and rosemary. Add the chicken breasts and marinate for at least 15 minutes.

Cooking Process

  1. Searing the Chicken:

    • Heat a large skillet over medium-high heat. Add the marinated chicken breasts and sear until golden brown on both sides, about 4-5 minutes per side.
  2. Cooking the Artichokes:

    • In the same skillet, add the artichoke hearts and cook for 5 minutes until they start to brown slightly.
  3. Combining and Finishing the Dish:

    • Add the chicken broth to the skillet and bring to a simmer. Return the chicken breasts to the skillet and cook until the chicken is fully cooked through, about 15-20 minutes. Ensure the internal temperature of the chicken reaches 165°F (75°C).

Serving Suggestions

To enhance your dining experience, consider the following serving suggestions:

  • Ideal Side Dishes:

    • Roasted potatoes or a fresh garden salad
    • Steamed asparagus or green beans
  • Wine Pairing Recommendations:

    • A crisp white wine such as Sauvignon Blanc or Pinot Grigio pairs perfectly with this dish.
  • Presentation Tips:

    • Garnish with fresh parsley and lemon wedges for a vibrant touch.

Tips and Tricks

  • How to Pick the Best Artichokes:

    • Choose artichokes with tightly packed leaves and a firm texture. Avoid any that feel soft or have brown spots.
  • Marinating Tips for Juicy Chicken:

    • Allow the chicken to marinate for at least 30 minutes to enhance flavor and tenderness.
  • Cooking Tips for Even Doneness:

    • Use a meat thermometer to check the internal temperature of the chicken to ensure it’s cooked through without being overdone.

Common Mistakes to Avoid

  1. Overcooking the Chicken:

    • This can result in dry, tough chicken. Use a meat thermometer to avoid overcooking.
  2. Underseasoning the Dish:

    • Make sure to season both the chicken and the artichokes adequately to bring out their flavors.
  3. Improper Artichoke Preparation:

    • Ensure that all tough leaves and the choke are removed if using fresh artichokes.

Variations of the Recipe

  • Adding Different Vegetables:

    • Experiment with adding vegetables like bell peppers or zucchini for added flavor and nutrition.
  • Using Different Herbs and Spices:

    • Try using fresh basil or oregano for a different twist on the classic recipe.
  • Making It a One-Pot Meal:

    • Add rice or quinoa to the skillet to soak up the delicious broth and make it a complete meal.

Health Benefits

  • Nutritional Advantages of Artichokes:

    • Artichokes are high in fiber, antioxidants, and vitamins, which can aid in digestion and overall health.
  • Benefits of Lean Protein from Chicken:

    • Chicken is a great source of lean protein, which is essential for muscle repair and growth.
  • Overall Health Benefits of the Dish:

    • Combining lean protein with nutrient-rich vegetables makes this dish a well-balanced and healthy meal option.

History and Origin

Astoria Artichoke Chicken has its roots in Mediterranean cuisine, known for its use of fresh, wholesome ingredients. The dish gained popularity in Astoria, a neighborhood in Queens, New York, known for its rich culinary diversity. Over time, this flavorful recipe has become a favorite among locals and food enthusiasts alike. 

Introduction

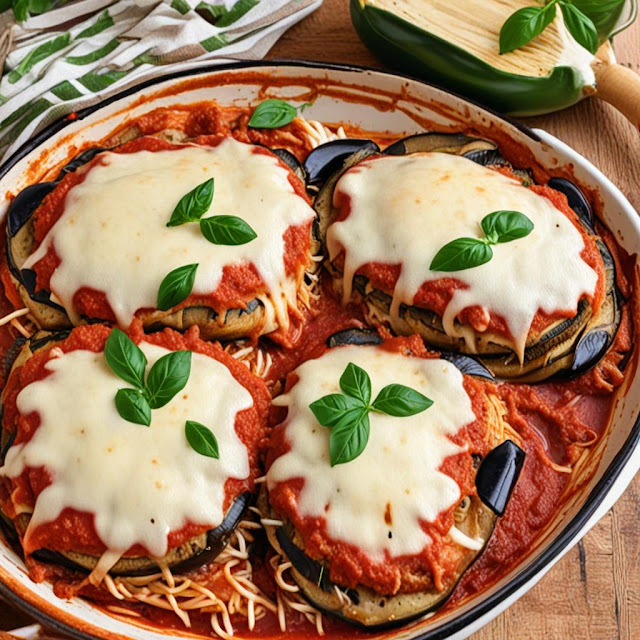
Effortless Eggplant Parmesan is a simple and delicious version of the classic Italian dish, perfect for busy weeknights. With layers of tender eggplant, rich marinara sauce, and gooey melted cheese, this recipe delivers all the comforting flavors you love without the fuss.


Ingredients

  • 2 medium eggplants, sliced into 1/4-inch rounds
  • 1 cup all-purpose flour
  • 2 eggs, beaten
  • 2 cups Italian-style breadcrumbs
  • 1 cup grated Parmesan cheese
  • 2 cups marinara sauce
  • 2 cups shredded mozzarella cheese
  • 1/4 cup chopped fresh basil (optional)
  • Salt and pepper to taste
  • Olive oil for frying

Directions

  1. Prepare the Eggplant:
    • Sprinkle eggplant slices with salt and let sit for 30 minutes to draw out excess moisture. Rinse and pat dry.
  2. Bread the Eggplant:
    • Place flour, beaten eggs, and breadcrumbs in separate shallow bowls.
    • Dredge each eggplant slice in flour, dip in egg, and coat with breadcrumbs.
  3. Fry the Eggplant:
    • Heat olive oil in a large skillet over medium heat.
    • Fry eggplant slices until golden brown, about 2-3 minutes per side. Transfer to paper towels to drain.
  4. Assemble the Dish:
    • Preheat oven to 375°F (190°C).
    • Spread a thin layer of marinara sauce in a baking dish.
    • Arrange a layer of fried eggplant slices on top.
    • Sprinkle with grated Parmesan cheese and a layer of marinara sauce.
    • Repeat layers until all ingredients are used, finishing with a layer of marinara sauce and mozzarella cheese.
  5. Bake:
    • Cover with foil and bake for 25 minutes.
    • Remove foil and bake for an additional 10-15 minutes, until cheese is bubbly and golden.
  6. Serve:
    • Let cool for a few minutes before serving.
    • Garnish with chopped fresh basil, if desired. Enjoy

 Introduction

The Tribeca Tri-Tip Roast is a flavorful and tender cut of beef, perfect for a special occasion or a family dinner. This roast is known for its rich taste and juicy texture, making it a favorite among meat lovers.


Ingredients

  • 1 (2-3 pound) tri-tip roast
  • 3 tablespoons olive oil
  • 4 cloves garlic, minced
  • 1 tablespoon fresh rosemary, chopped
  • 1 tablespoon fresh thyme, chopped
  • 1 tablespoon kosher salt
  • 1 teaspoon black pepper
  • 1 teaspoon smoked paprika

Directions

  1. Preheat Oven: Preheat your oven to 400°F (200°C).
  2. Prepare the Roast: In a small bowl, mix together the olive oil, minced garlic, rosemary, thyme, kosher salt, black pepper, and smoked paprika to create a marinade.
  3. Marinate: Rub the marinade all over the tri-tip roast, ensuring it is evenly coated. Let it sit for at least 30 minutes to absorb the flavors.
  4. Sear the Roast: Heat a large oven-safe skillet over medium-high heat. Sear the roast on all sides until it is browned, about 2-3 minutes per side.
  5. Roast in the Oven: Transfer the skillet to the preheated oven and roast for about 20-30 minutes, or until the internal temperature reaches 130°F (54°C) for medium-rare.
  6. Rest and Serve: Remove the roast from the oven and let it rest for 10-15 minutes before slicing. This allows the juices to redistribute, ensuring a moist and tender roast.
  7. Slice and Enjoy: Slice the roast against the grain and serve with your favorite sides.

 Introduction

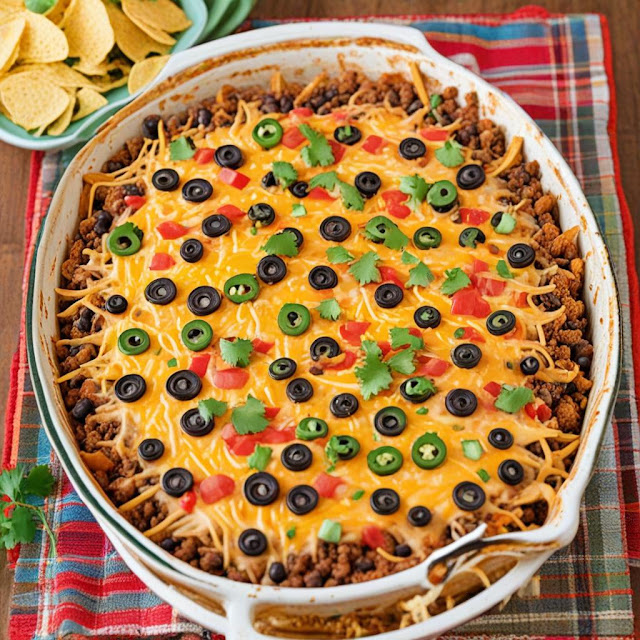
A Taco Casserole is a delicious, easy-to-make dish that's perfect for family dinners or gatherings. This flavorful casserole combines all the best elements of tacos—ground beef, beans, cheese, and a variety of toppings—into one hearty dish.


Ingredients

  • 1 pound ground beef
  • 1 packet taco seasoning
  • 1 can black beans, drained and rinsed
  • 1 can corn, drained
  • 1 can diced tomatoes with green chilies
  • 1 cup shredded cheese (cheddar or a blend)
  • 1 bag tortilla chips, slightly crushed
  • 1/2 cup sliced black olives
  • 1/2 cup chopped green onions
  • 1/2 cup chopped tomatoes
  • 1/4 cup chopped cilantro
  • Jalapeño slices (optional)

Directions

  1. Preheat Oven: Preheat your oven to 350°F (175°C).
  2. Cook Ground Beef: In a large skillet over medium-high heat, cook the ground beef until browned. Drain any excess fat.
  3. Add Seasoning: Add the taco seasoning to the ground beef, following the package instructions (usually involves adding some water and simmering).
  4. Combine Ingredients: In a large mixing bowl, combine the cooked ground beef, black beans, corn, and diced tomatoes with green chilies.
  5. Layer Chips and Meat: In a large casserole dish, spread a layer of slightly crushed tortilla chips. Add the meat mixture over the chips.
  6. Add Cheese: Sprinkle the shredded cheese evenly over the top.
  7. Bake: Bake in the preheated oven for about 20-25 minutes, until the cheese is melted and bubbly.
  8. Add Toppings: Remove from the oven and sprinkle with sliced black olives, chopped green onions, chopped tomatoes, chopped cilantro, and jalapeño slices if using.
  9. Serve: Serve hot, with additional tortilla chips on the side if desired.

 Introduction

Williamsburg Walnut Chicken is a delightful dish that combines tender chicken breasts with a rich and savory walnut sauce. This recipe, inspired by the historic flavors of Colonial Williamsburg, features a harmonious blend of ingredients that create a mouthwatering meal perfect for any occasion. The combination of succulent chicken, crunchy walnuts, and a sweet yet savory glaze served over a bed of fluffy rice makes this dish a standout favorite.


Ingredients:

  • 4 boneless, skinless chicken breasts
  • 1 cup chicken broth
  • 1/2 cup soy sauce
  • 1/4 cup honey
  • 1/4 cup brown sugar
  • 1/4 cup rice vinegar
  • 3 cloves garlic, minced
  • 1 tablespoon fresh ginger, grated
  • 1/2 teaspoon red pepper flakes (optional)
  • 1/2 cup chopped walnuts
  • 2 tablespoons cornstarch
  • 2 tablespoons water
  • Cooked rice, for serving
  • Fresh parsley or green onions, for garnish

Directions:

  1. Preheat the oven to 375°F (190°C).
  2. In a medium bowl, whisk together the chicken broth, soy sauce, honey, brown sugar, rice vinegar, minced garlic, grated ginger, and red pepper flakes (if using).
  3. Place the chicken breasts in a baking dish and pour the sauce over them, making sure they are well-coated.
  4. Bake the chicken in the preheated oven for 25-30 minutes, or until the chicken is cooked through and no longer pink in the center.
  5. While the chicken is baking, toast the chopped walnuts in a dry skillet over medium heat until fragrant and lightly browned. Set aside.
  6. In a small bowl, mix the cornstarch and water to create a slurry. Remove the chicken from the baking dish and set aside, keeping warm.
  7. Pour the sauce from the baking dish into a saucepan and bring to a simmer over medium heat. Stir in the cornstarch slurry and continue to cook, stirring constantly, until the sauce thickens.
  8. Return the chicken to the baking dish and pour the thickened sauce over the top. Sprinkle with toasted walnuts.
  9. Serve the chicken over a bed of cooked rice, garnished with fresh parsley or green onions.
Newer Posts Older Posts Home

ABOUT ME

"Discover the culinary magic at My Bella Recipe! Indulge in a world of mouthwatering recipes, cooking tips, and delightful food stories. Join our community of food enthusiasts and elevate your kitchen game today!"

SUBSCRIBE & FOLLOW

POPULAR POSTS

Categories

  • Beef Recipe 15
  • Chicken Recipes 37
  • Deliciously Easy Recipes 4
  • Dinner Recipes 21
  • Easy Recipes 3
  • Ground Beef Recipe 2
  • Home
  • About
  • Contact
  • Privacy Policy

Slider

4-latest-1110px-slider

Comments

4-comments
Bella  Recip
Powered by Blogger

Distributed By Gooyaabi | Designed by OddThemes

Report Abuse

Blog Archive

  • ▼  2024 (82)
    • ▼  August (9)
      • Loaded Beef Nachos:ground beef recipe
      • West Village White Wine Chicken:Chicken Recipe
      • No-Fuss Fajitas Deliciously Easy Recipes
      • 20-Minute Taco Salad: A Delicious and Quick Recipe...
      • Astoria Artichoke Chicken:Easy Chicken Recipe,Chic...
      • Effortless Eggplant Parmesan
      • Tribeca Tri-Tip Roast,Beef Recipe ,Easy Beef Recipe
      • Taco Casserole,Dinner Recipe,Easy Dinner Recipe
      • Williamsburg Walnut Chicken,Easy Chicken Recipe,Ch...
    • ►  July (41)
    • ►  June (32)

Search

Sections

  • Beef Recipe
  • Chicken Recipes
  • Deliciously Easy Recipes
  • Dinner Recipes
  • Easy Recipes
  • Ground Beef Recipe

Archive

  • Aug 20249
  • Jul 202441
  • Jun 202432
Logo

Boxed Version

  • Home
  • recentPostsHeadline

Pinterest

  • pinterest

About Me

My photo
Bella Recipe
View my complete profile

Labels

Beef Recipe 15 Chicken Recipes 37 Deliciously Easy Recipes 4 Dinner Recipes 21 Easy Recipes 3 Ground Beef Recipe 2

Labels

  • Beef Recipe (15)
  • Chicken Recipes (37)
  • Deliciously Easy Recipes (4)
  • Dinner Recipes (21)
  • Easy Recipes (3)
  • Ground Beef Recipe (2)
  • Home
  • About us
  • Contact us
  • Privacy Policy
  • Disclaimer

Trending now

Image
Easy Air Fryer Chicken Quesadillas Recipe
Easy Air Fryer Chicken Quesadillas Recipe Introduction: Craving a quick and delicious …
Image
Dooky Chase-Style Fried Chicken: A Culinary Delight
Dooky Chase-Style Fried Chicken: A Culinary Delight Introduction Dooky Chase's Restau…
Image
Red Wine-Braised Beef Tips
The Ultimate Guide to Red Wine-Braised Beef Tips Introduction Imagine walking into your k…
Image
One Pan Chicken Gnocchi: A Flavorful and Convenient Meal
One Pan Chicken Gnocchi: A Flavorful and Convenient Meal One-pan meals have become a go-…
Image
Bronx Lemon Pepper Chicken A Flavor Explosion Chicken Recipe Easy Chicken Recipe
Bronx Lemon Pepper Chicken: A Flavor Explosion Introduction Bronx Lemon Pepper Chicken i…

Popular Posts

Trending Articles

About Blog

"Discover the culinary magic at My Bella Recipe! Indulge in a world of mouthwatering recipes, cooking tips, and delightful food stories. Join our community of food enthusiasts and elevate your kitchen game today!"

Popular Posts

  • Garlic Butter Steak Bites Dinner Recipe, Easy Dinner Recipe
  • Greenwich Village Greek Chicken: A Culinary Delight Chicken Recipe
  • Spicy Taco Beef Skillet, Ground Beef Recipe

Labels

  • Beef Recipe 15
  • Chicken Recipes 37
  • Deliciously Easy Recipes 4
  • Dinner Recipes 21
  • Easy Recipes 3
  • Ground Beef Recipe 2