Bella  Recip
  • Home
  • Beef
  • Recipes
  • Features
    • Lifestyle
    • Sports Group
      • Category 1
      • Category 2
      • Category 3
      • Category 4
      • Category 5
    • Sub Menu 3
    • Sub Menu 4
  • Chicken

Central Park Pot Roast A Hearty Family Meal Beef Recipe  

Introduction

Who doesn’t love a good pot roast? Central Park Pot Roast isn’t just any pot roast; it’s a heartwarming, soul-soothing dish that brings a touch of New York elegance to a beloved classic. This dish is perfect for a cozy family dinner, a gathering with friends, or even a special occasion. But what makes it stand out from the rest?


History of Pot Roast

Origins of Pot Roast

Pot roast has been a staple in many cultures, with variations seen across the globe. Traditionally, it’s a method of slow-cooking tough cuts of meat to tender perfection.

Evolution of the Recipe

Over time, pot roast recipes have evolved, incorporating various herbs, vegetables, and cooking methods. The Central Park Pot Roast adds a modern twist while keeping the traditional essence intact.

How Central Park Pot Roast Differentiates

Central Park Pot Roast combines classic ingredients with a unique blend of herbs and a touch of sophistication, making it a standout dish.

Ingredients

Main Ingredients

  • Beef Roast (3-4 lbs, chuck or brisket)
  • Carrots (4-5, peeled and chopped)
  • Potatoes (4-5, quartered)
  • Onions (2, sliced)
  • Garlic (4 cloves, minced)
  • Beef Broth (4 cups)
  • Red Wine (1 cup, optional)
  • Tomato Paste (2 tbsp)
  • Thyme (1 tsp)
  • Rosemary (1 tsp)
  • Salt and Pepper (to taste)
  • Olive Oil (2 tbsp)

Optional Add-ins

  • Mushrooms (1 cup, sliced)
  • Celery (2 stalks, chopped)
  • Parsnips (2, chopped)
  • Bay Leaves (2)

Choosing the Best Meat

Selecting the right cut is crucial. Chuck roast and brisket are excellent choices for their marbling and flavor.


Preparation Steps

Prepping the Meat

Start by patting the beef roast dry with paper towels. Season generously with salt and pepper.

Chopping the Vegetables

Cut your vegetables into uniform pieces for even cooking. This step ensures each bite is perfectly tender.

Seasoning Tips

Season the meat and vegetables well. Fresh herbs and a pinch of salt can elevate the flavors significantly.

Cooking Directions

Browning the Meat

Heat olive oil in a large skillet over medium-high heat. Sear the roast on all sides until browned. This step locks in the juices and adds depth to the flavor.

Slow Cooker Method

Place the browned roast in a slow cooker. Add vegetables, garlic, beef broth, wine, tomato paste, and herbs. Cover and cook on low for 8-10 hours or high for 4-5 hours.

Oven Method

Preheat your oven to 325°F (163°C). Place the roast and vegetables in a large Dutch oven. Add the remaining ingredients, cover, and bake for 3-4 hours or until the meat is tender.

Stovetop Method

In a large pot, combine the browned meat with vegetables and other ingredients. Bring to a boil, then reduce heat and simmer for 3-4 hours.

Serving Suggestions

Best Side Dishes

Pot roast pairs beautifully with mashed potatoes, green beans, or a simple garden salad.

Wine Pairings

A robust red wine, like Cabernet Sauvignon or Merlot, complements the rich flavors of the roast.

Presentation Tips

Serve your pot roast in a large, shallow dish. Arrange the vegetables around the meat and drizzle with the cooking juices.

Nutritional Information

Calories and Macronutrients

A serving of Central Park Pot Roast provides approximately 400-500 calories, with a balance of protein, healthy fats, and carbohydrates from the vegetables.

Health Benefits

Rich in protein and essential nutrients, this dish supports muscle health and provides a hearty dose of vitamins and minerals.

Dietary Modifications

For a lower-carb option, skip the potatoes and add more non-starchy vegetables like broccoli or cauliflower.

Tips for Perfect Pot Roast

Common Mistakes to Avoid

  • Not browning the meat: This step is crucial for flavor.
  • Overcooking the vegetables: Add them halfway through the cooking time if using a slow cooker.

Crispy Baked Fish Tacos Dinner Recipe

Introduction

Who doesn't love a good taco? Especially when it's packed with crispy, flavorful fish and all the right toppings. Fish tacos are a delightful way to mix up your taco game, and baking the fish instead of frying keeps things light and healthy. Perfect for a quick weeknight meal or a laid-back weekend feast, these crispy baked fish tacos are sure to become a favorite.


Ingredients

Fish Selection

  • Fresh white fish fillets (such as cod, tilapia, or halibut)

Essential Seasonings

  • 1 tsp paprika
  • 1 tsp garlic powder
  • 1 tsp onion powder
  • 1 tsp cumin
  • Salt and pepper to taste

Taco Essentials

  • Corn or flour tortillas
  • Lime wedges

Optional Toppings

  • Shredded cabbage or lettuce
  • Diced tomatoes
  • Sliced avocado
  • Chopped cilantro
  • Sour cream or Greek yogurt
  • Salsa or hot sauce

Preparing the Fish

Choosing the Right Fish

Opt for fresh, firm white fish fillets like cod, tilapia, or halibut. These varieties hold up well during baking and have a mild flavor that complements the spices.

Marinating Process

  1. Rinse the fish fillets and pat them dry with paper towels.
  2. In a small bowl, mix the paprika, garlic powder, onion powder, cumin, salt, and pepper.
  3. Rub the spice mixture evenly over the fish fillets.
  4. Let the fish marinate for at least 15 minutes to absorb the flavors.

Tips for a Crispy Coating

For extra crispiness, lightly coat the fish with a thin layer of breadcrumbs or crushed cornflakes before baking.


Baking the Fish

Preheating the Oven

Preheat your oven to 400°F (200°C). This ensures the fish bakes evenly and develops a nice, crispy exterior.

Arranging the Fish on the Baking Sheet

Line a baking sheet with parchment paper or lightly grease it. Arrange the marinated fish fillets in a single layer, making sure they don't overlap.

Baking Time and Temperature

Bake the fish for about 15-20 minutes, or until it flakes easily with a fork and is golden brown on the outside.

Preparing the Tacos

Selecting the Tortillas

Choose between corn and flour tortillas based on your preference. Corn tortillas are traditional and add a nice flavor, while flour tortillas are softer and more pliable.

Heating the Tortillas

Warm the tortillas in a dry skillet over medium heat for about 30 seconds on each side, or wrap them in a damp paper towel and microwave for about 20 seconds.

Adding the Base Layer

Start with a base of shredded cabbage or lettuce on each tortilla to add crunch and freshness.

Assembling the Tacos

Adding the Fish

Place a portion of the baked fish on top of the cabbage or lettuce.

Layering with Toppings

Add your favorite toppings, such as diced tomatoes, sliced avocado, chopped cilantro, and a dollop of sour cream or Greek yogurt.

Garnishing Tips

Finish with a squeeze of fresh lime juice and a sprinkle of chopped cilantro for extra flavor.

Serving Suggestions

Side Dishes

Pair your crispy baked fish tacos with Mexican rice, black beans, or a simple salad.

Beverages to Pair With

Serve with a cold cerveza, margarita, or a refreshing glass of agua fresca.

Health Benefits

Nutritional Value of Fish

Fish is a great source of lean protein, omega-3 fatty acids, and essential vitamins and minerals.

Benefits of Baking Over Frying

Baking reduces the amount of added fat and calories, making these tacos a healthier option.

Including More Fish in Your Diet

Incorporating more fish into your diet can promote heart health, improve brain function, and provide numerous other health benefits.

Variations and Substitutions

Different Types of Fish

Try different fish like mahi-mahi, snapper, or even salmon for a unique twist.

Vegetarian and Vegan Options

Substitute the fish with crispy tofu, tempeh, or roasted vegetables for a delicious vegetarian or vegan alternative.

Gluten-Free Tortillas

Use corn tortillas or gluten-free flour tortillas to accommodate gluten-free diets.

Tips and Tricks

Achieving the Perfect Crispiness

Ensure your oven is fully preheated and don't overcrowd the baking sheet to allow for even crisping.

Enhancing Flavors

Experiment with different spices and herbs to customize the flavor profile of your fish tacos.

Storing Leftovers

Store any leftover fish in an airtight container in the fridge for up to two days. Reheat in the oven to maintain crispiness.

Common Mistakes to Avoid

Overbaking the Fish

Keep an eye on the fish to prevent it from becoming dry and overcooked.

Not Marinating Properly

Allow enough time for the fish to marinate and absorb the flavors of the spices.

Wrong Tortilla Choices

Choose fresh, high-quality tortillas to enhance the overall taste and texture of your tacos.

 Chelsea Chimichurri Chicken: A Flavorful Culinary Delight

Introduction

Chelsea Chimichurri Chicken is a delightful and flavorful dish that combines the succulent taste of grilled chicken with the zesty and aromatic notes of chimichurri sauce. This dish not only tantalizes the taste buds but also brings a burst of vibrant colors to the dining table. Originating from the rich culinary traditions of Argentina, chimichurri sauce is a versatile condiment that has found a special place in many kitchens worldwide.

But why does this dish stand out? It's simple: the perfect harmony of well-marinated chicken and fresh, herbaceous chimichurri makes it a crowd-pleaser. Whether you're hosting a summer barbecue or looking for a quick weeknight dinner, Chelsea Chimichurri Chicken is your go-to recipe.


Ingredients

Main Ingredients for the Chicken

  • 4 chicken breasts or thighs
  • 2 tablespoons olive oil
  • 1 teaspoon salt
  • 1/2 teaspoon black pepper
  • 1/2 teaspoon paprika
  • 1/2 teaspoon garlic powder

Ingredients for the Chimichurri Sauce

  • 1 cup fresh parsley, finely chopped
  • 1/2 cup fresh cilantro, finely chopped
  • 1/4 cup red wine vinegar
  • 3 cloves garlic, minced
  • 1 teaspoon dried oregano
  • 1/2 teaspoon red pepper flakes (optional for spice)
  • 1/2 cup olive oil
  • Salt and pepper to taste

Optional Additions

  • Cherry tomatoes, halved (for garnish)
  • Fresh lemon or lime juice (for an extra zing)
  • Avocado slices (for added creaminess)

Health Benefits

Nutritional Value of Chicken

Chicken is a great source of lean protein, essential for muscle growth and repair. It's also rich in vitamins and minerals such as B6, B12, and zinc, which contribute to overall health.

Benefits of Herbs and Spices in Chimichurri

The herbs in chimichurri, like parsley and cilantro, are packed with antioxidants, vitamins A and C, and anti-inflammatory properties. Garlic and red pepper flakes add not just flavor but also a boost to your immune system.

Preparation Time and Serving Size

  • Preparation Time: 15 minutes
  • Cooking Time: 20 minutes
  • Total Time: 35 minutes
  • Serving Size: Serves 4


Directions

Step-by-Step Guide to Preparing Chelsea Chimichurri Chicken

  1. Marinate the Chicken:

    • In a bowl, mix olive oil, salt, pepper, paprika, and garlic powder.
    • Rub this mixture onto the chicken breasts or thighs, ensuring they are well-coated. Let it marinate for at least 15 minutes.
  2. Prepare the Chimichurri Sauce:

    • In a food processor or blender, combine parsley, cilantro, red wine vinegar, minced garlic, oregano, and red pepper flakes.
    • Pulse until finely chopped. Slowly add olive oil while blending until the mixture is well combined but still has some texture.
    • Season with salt and pepper to taste.
  3. Grill the Chicken:

    • Preheat your grill to medium-high heat.
    • Grill the chicken for about 6-7 minutes on each side, or until the internal temperature reaches 165°F (75°C).
    • Remove from the grill and let it rest for a few minutes.
  4. Serve:

    • Place the grilled chicken on a serving plate.
    • Generously spoon chimichurri sauce over the top.
    • Garnish with halved cherry tomatoes and optional avocado slices.

Tips for Perfect Grilling

  • Ensure the grill is properly preheated to avoid sticking.
  • Use a meat thermometer to check doneness without cutting into the chicken.
  • Let the chicken rest after grilling to retain its juices.

Alternative Cooking Methods

  • Oven: Bake the marinated chicken at 400°F (200°C) for 20-25 minutes.
  • Stovetop: Sear the chicken in a hot skillet with a bit of oil, 5-6 minutes per side, until fully cooked.

Serving Suggestions

Side Dishes That Complement the Chicken

  • Grilled Vegetables: Zucchini, bell peppers, and asparagus.
  • Salads: A fresh green salad with a light vinaigrette.
  • Rice or Quinoa: Perfect for soaking up extra chimichurri sauce.

Beverage Pairings

  • White Wine: A crisp Sauvignon Blanc.
  • Beer: A light, hoppy IPA.
  • Non-Alcoholic: Sparkling water with a splash of lime.

Vegetarian Stuffed Peppers

Introduction

Vegetarian Stuffed Peppers are a delightful and colorful dish that is perfect for a wholesome and nutritious meal. These peppers are filled with a delicious mixture of rice, black beans, vegetables, and cheese, making them a satisfying and hearty option for vegetarians and meat-lovers alike.


Ingredients

  • 4 large bell peppers (red, yellow, green, or orange)
  • 1 cup cooked rice
  • 1 can (15 oz) black beans, drained and rinsed
  • 1 small onion, finely chopped
  • 2 cloves garlic, minced
  • 1 cup corn kernels (fresh or frozen)
  • 1 cup diced tomatoes
  • 1 cup shredded cheese (cheddar, mozzarella, or your choice)
  • 2 tablespoons olive oil
  • 1 teaspoon cumin
  • 1 teaspoon paprika
  • Salt and pepper to taste
  • Fresh cilantro or parsley for garnish (optional)

Directions

  1. Preheat the Oven: Preheat your oven to 375°F (190°C).
  2. Prepare the Peppers: Cut the tops off the bell peppers and remove the seeds and membranes. If needed, trim the bottoms slightly to make sure they stand upright.
  3. Cook the Filling: In a large skillet, heat the olive oil over medium heat. Add the chopped onion and garlic, and sauté until they are softened and fragrant, about 3-4 minutes.
  4. Mix the Ingredients: Add the corn, diced tomatoes, black beans, and cooked rice to the skillet. Stir in the cumin, paprika, salt, and pepper. Cook for another 5 minutes, allowing the flavors to blend.
  5. Stuff the Peppers: Spoon the filling mixture into each of the bell peppers, packing it in gently. Place the stuffed peppers in a baking dish.
  6. Add Cheese: Sprinkle the shredded cheese over the top of each stuffed pepper.
  7. Bake: Cover the baking dish with aluminum foil and bake in the preheated oven for 25-30 minutes. Remove the foil and bake for an additional 10-15 minutes, or until the peppers are tender and the cheese is melted and golden.
  8. Serve: Garnish with fresh cilantro or parsley if desired. Serve hot and enjoy your delicious Vegetarian Stuffed Peppers!

 Fifth Avenue Fajita Chicken

Introduction

Experience the vibrant flavors of the city with our Fifth Avenue Fajita Chicken. This dish combines juicy, grilled chicken strips with a medley of bell peppers and spices, served over a bed of fluffy rice or with warm tortillas. Perfect for a weeknight dinner or a festive gathering, this recipe is sure to impress with its zesty taste and colorful presentation.


Ingredients

  • 2 boneless, skinless chicken breasts
  • 1 red bell pepper, sliced
  • 1 yellow bell pepper, sliced
  • 1 lime, quartered
  • 1 tablespoon olive oil
  • 1 tablespoon fajita seasoning
  • 1 cup cooked rice or warm tortillas
  • Fresh cilantro for garnish
  • Salt and pepper to taste

Directions

  1. Prepare the Chicken: Preheat your grill or skillet over medium-high heat. Brush the chicken breasts with olive oil and season with fajita seasoning, salt, and pepper.
  2. Cook the Chicken: Grill or cook the chicken in the skillet for about 6-7 minutes on each side, or until fully cooked and no longer pink inside. Remove from heat and let it rest for a few minutes before slicing into strips.
  3. Cook the Vegetables: In the same skillet, add a bit more olive oil if needed and sauté the bell peppers until they are tender but still crisp, about 5 minutes.
  4. Assemble the Dish: Place a portion of cooked rice on each plate or warm tortillas on a serving dish. Top with sliced chicken and sautéed bell peppers.
  5. Garnish and Serve: Garnish with fresh cilantro and lime wedges. Serve immediately and enjoy your Fifth Avenue Fajita Chicken!

 Bronx Beef Burritos A Culinary Delight

Introduction

Bronx Beef Burritos are a culinary staple that represents the rich, diverse food culture of the Bronx. These flavorful wraps are more than just a meal; they are a testament to the vibrant community and the blend of cultures that make the Bronx unique. But what exactly makes these burritos so special? Let’s dive in.


The History of Burritos

Burritos have a long history that dates back to Mexican cuisine. Originating from the northern regions of Mexico, these hearty wraps were designed to be a portable meal. Over time, burritos evolved, and as they crossed borders, they took on new flavors and ingredients, especially in the Bronx, where cultural melting pot influences reign supreme.

 Ingredients Required 

1. Beef Selection:

  • Lean Cuts: Opt for high-quality, lean cuts like sirloin or flank steak.
  • Ground Beef: Alternatively, you can use ground beef for a different texture.

2. Vegetables and Spices:

  • Bell Peppers: Fresh red, green, or yellow bell peppers, diced.
  • Onions: White or red onions, finely chopped.
  • Garlic: Fresh garlic cloves, minced.
  • Cilantro: Fresh cilantro leaves, chopped.
  • Tomatoes: Fresh tomatoes, diced.
  • Jalapeños: For a spicy kick, optional.
  • Lettuce: Shredded lettuce for added crunch.
  • Lime: Fresh lime juice for marinating the beef and adding a zesty flavor.

3. Spices and Seasonings:

  • Cumin: Ground cumin for a warm, earthy flavor.
  • Chili Powder: For heat and depth of flavor.
  • Paprika: Adds a smoky taste.
  • Salt and Pepper: To taste.
  • Olive Oil: For marinating the beef and sautéing vegetables.

4. Tortilla Choices:

  • Flour Tortillas: Large, soft flour tortillas are ideal for wrapping.
  • Corn Tortillas: If you prefer a different texture and flavor, use corn tortillas.


Preparation Steps

  1. Marinating the Beef: Start by marinating the beef in a mixture of olive oil, lime juice, garlic, cumin, and chili powder. Let it sit for at least an hour.
  2. Cooking the Beef: Sear the beef on high heat to lock in the juices, then cook to your desired doneness.
  3. Preparing the Vegetables: Sauté bell peppers and onions until they are tender and slightly caramelized.
  4. Assembling the Burrito: Lay out the tortilla, add a layer of cooked beef, top with sautéed vegetables, and add fresh cilantro. Roll it up tightly.

Cooking Techniques

The method of cooking can significantly affect the taste and texture of your burritos. Grilling the beef adds a smoky flavor, while frying can give it a crispy texture. The key is to cook the beef just right so it's juicy and flavorful.

Serving Suggestions

Bronx Beef Burritos are best served with traditional sides like guacamole, sour cream, and salsa. For a modern twist, try serving them with a side of quinoa salad or sweet potato fries.

Health Benefits of Beef Burritos

Beef is a great source of protein and essential nutrients like iron and vitamin B12. When paired with fresh vegetables, Bronx Beef Burritos can be part of a balanced diet, offering a good mix of protein, fiber, and vitamins.

 Central Park Chicken Salad Chicken Recipe

Introduction

This Central Park Chicken Salad is a refreshing and hearty dish perfect for a light lunch or dinner. It features tender slices of seasoned chicken breast combined with crunchy vegetables and a delicious dressing, all served on a bed of crisp lettuce.


Ingredients

  • 2 cups cooked chicken breast, sliced
  • 1 cup edamame beans, shelled
  • 1/2 cup celery, diced
  • 1/4 cup red onion, thinly sliced
  • 1/2 cup radicchio, chopped
  • 1/4 cup feta cheese, crumbled
  • 4 cups butter lettuce leaves

Dressing

  • 1/4 cup plain Greek yogurt
  • 2 tablespoons mayonnaise
  • 1 tablespoon lemon juice
  • 1 teaspoon Dijon mustard
  • 1 garlic clove, minced
  • Salt and pepper to taste

Directions

  1. Prepare the Dressing: In a small bowl, whisk together the Greek yogurt, mayonnaise, lemon juice, Dijon mustard, minced garlic, salt, and pepper. Adjust seasoning to taste.
  2. Mix the Salad: In a large mixing bowl, combine the sliced chicken, edamame beans, celery, red onion, radicchio, and feta cheese.
  3. Add Dressing: Pour the dressing over the salad mixture and toss until everything is well coated.
  4. Serve: Arrange the butter lettuce leaves on a serving plate and spoon the chicken salad mixture on top. Serve immediately.

Chicken Alfredo Bake Dinner Recipe

Introduction

Chicken Alfredo Bake is a delicious and creamy pasta dish that combines tender chicken, rich Alfredo sauce, and perfectly cooked pasta, all baked to perfection. This comforting dish is perfect for a family dinner or any gathering, offering a delightful blend of flavors and textures that everyone will love.


Ingredients

  • 2 cups cooked chicken breast, diced
  • 12 oz penne pasta (or your preferred pasta)
  • 2 cups Alfredo sauce (store-bought or homemade)
  • 1 cup shredded mozzarella cheese
  • 1/2 cup grated Parmesan cheese
  • 1/4 cup chopped fresh parsley (optional, for garnish)
  • Salt and pepper to taste
  • 1 tbsp olive oil (for cooking chicken, if uncooked)
  • 1 clove garlic, minced (optional)

Directions

  1. Preheat Oven: Preheat your oven to 375°F (190°C).

  2. Cook Pasta: Bring a large pot of salted water to a boil. Add the pasta and cook according to the package instructions until al dente. Drain and set aside.

  3. Prepare Chicken: If using raw chicken, heat the olive oil in a large skillet over medium heat. Add the diced chicken and cook until no longer pink, about 5-7 minutes. Season with salt and pepper. Add the minced garlic and cook for another minute. If using pre-cooked chicken, simply dice it and set aside.

  4. Mix Ingredients: In a large mixing bowl, combine the cooked pasta, diced chicken, Alfredo sauce, and half of the shredded mozzarella cheese. Stir until well combined.

  5. Assemble the Bake: Transfer the pasta mixture to a greased baking dish. Sprinkle the remaining mozzarella cheese and the grated Parmesan cheese evenly over the top.

  6. Bake: Place the baking dish in the preheated oven and bake for 20-25 minutes, or until the cheese is melted and bubbly, and the top is golden brown.

  7. Garnish and Serve: Remove from the oven and let it cool for a few minutes. Garnish with chopped fresh parsley, if desired. Serve warm and enjoy!

 Times Square Teriyaki Chicken

Introduction

Times Square Teriyaki Chicken is a delicious and easy-to-make dish that brings the classic flavors of teriyaki to your kitchen. This dish features succulent chicken breasts marinated and cooked in a rich, savory teriyaki sauce, served over a bed of fluffy rice and garnished with green onions and sesame seeds. Perfect for a quick weeknight dinner or a flavorful weekend meal, this recipe will become a favorite in your household.


Ingredients

  • 4 boneless, skinless chicken breasts
  • 1 cup teriyaki sauce
  • 2 tablespoons soy sauce
  • 1 tablespoon honey
  • 2 cloves garlic, minced
  • 1 tablespoon fresh ginger, grated
  • 2 tablespoons vegetable oil
  • 4 cups cooked white rice
  • 2 green onions, chopped
  • 1 tablespoon sesame seeds

Directions

  1. Marinate the Chicken: In a medium bowl, mix together the teriyaki sauce, soy sauce, honey, minced garlic, and grated ginger. Add the chicken breasts to the marinade, ensuring they are well-coated. Cover and refrigerate for at least 30 minutes, or up to 2 hours for more intense flavor.

  2. Cook the Chicken: Heat the vegetable oil in a large skillet over medium-high heat. Remove the chicken from the marinade (reserving the marinade) and cook for about 6-7 minutes on each side, or until the chicken is fully cooked and has a nice caramelized exterior. Remove the chicken from the skillet and set aside.

  3. Make the Sauce: Pour the reserved marinade into the same skillet and bring it to a boil. Reduce the heat and let it simmer for about 5 minutes, or until the sauce has thickened slightly.

  4. Slice the Chicken: While the sauce is simmering, slice the cooked chicken breasts into strips.

  5. Assemble the Dish: Place a portion of cooked white rice onto each serving plate. Top with the sliced chicken and drizzle with the thickened teriyaki sauce. Garnish with chopped green onions and sesame seeds.

  6. Serve: Serve immediately and enjoy your Times Square Teriyaki Chicken with your favorite vegetables or a simple salad on the side.

 Lower East Side Orange Chicken

Introduction

This Lower East Side Orange Chicken is a delicious, tangy, and slightly sweet dish that combines the flavors of fresh orange with a hint of spice, perfect for a quick dinner that feels like a treat.


Ingredients

  • 1 lb boneless, skinless chicken breast, cut into bite-sized pieces
  • 1 cup all-purpose flour
  • 1/2 cup cornstarch
  • 1 teaspoon salt
  • 1 teaspoon black pepper
  • 1/2 teaspoon garlic powder
  • 2 eggs, beaten
  • Vegetable oil for frying
  • 1 cup orange juice
  • 1/2 cup soy sauce
  • 1/2 cup sugar
  • 1/4 cup rice vinegar
  • 1 tablespoon cornstarch mixed with 2 tablespoons water
  • 1 tablespoon grated ginger
  • 1 teaspoon minced garlic
  • 1/2 teaspoon red pepper flakes (optional)
  • 1 green bell pepper, diced
  • Cooked white rice
  • Green onions and sesame seeds for garnish

Directions

  1. Prepare the Chicken:
    • In a bowl, combine the flour, cornstarch, salt, pepper, and garlic powder.
    • Dip the chicken pieces into the beaten eggs, then coat with the flour mixture.
  2. Fry the Chicken:
    • Heat vegetable oil in a large skillet or deep fryer over medium-high heat.
    • Fry the coated chicken pieces in batches until golden brown and crispy. Drain on paper towels.
  3. Make the Sauce:
    • In a saucepan, combine the orange juice, soy sauce, sugar, rice vinegar, grated ginger, minced garlic, and red pepper flakes.
    • Bring the mixture to a boil, then reduce heat and simmer for 5 minutes.
    • Add the cornstarch and water mixture to the saucepan, stirring constantly until the sauce thickens.
  4. Combine and Serve:
    • Toss the fried chicken pieces with the orange sauce until well coated.
    • Add the diced green bell pepper and stir to combine.
    • Serve the orange chicken over cooked white rice.
    • Garnish with sliced green onions and sesame seeds.

 BBQ Pulled Pork Sandwiches

BBQ Pulled Pork Sandwiches are a classic, mouth-watering favorite that brings the flavors of slow-cooked, tender pork mixed with tangy and sweet barbecue sauce, all piled high on a soft bun. Perfect for family gatherings, picnics, or a comforting weeknight dinner, these sandwiches are easy to make and sure to satisfy. The addition of coleslaw adds a crunchy texture and a hint of freshness, making every bite a delightful combination of flavors and textures. Follow this simple recipe to create a delicious BBQ pulled pork sandwich that will have everyone coming back for more.


Ingredients:

  • 2 pounds pork shoulder or pork butt
  • 1 large onion, finely chopped
  • 3 cloves garlic, minced
  • 1 cup barbecue sauce (your favorite brand)
  • 1/2 cup chicken broth
  • 1/4 cup apple cider vinegar
  • 1 tablespoon brown sugar
  • 1 tablespoon Worcestershire sauce
  • 1 teaspoon paprika
  • 1/2 teaspoon cayenne pepper (optional, for a bit of heat)
  • Salt and black pepper, to taste
  • 8 hamburger buns
  • 1 cup coleslaw (optional, for topping)
  • Pickles (optional, for topping)

Directions:

  1. Prepare the Pork:

    • Season the pork shoulder generously with salt and black pepper.
    • In a slow cooker, add the chopped onion and minced garlic at the bottom.
    • Place the pork shoulder on top of the onion and garlic mixture.
  2. Mix the Sauce:

    • In a bowl, combine the barbecue sauce, chicken broth, apple cider vinegar, brown sugar, Worcestershire sauce, paprika, and cayenne pepper (if using).
    • Pour the sauce mixture over the pork shoulder in the slow cooker.
  3. Cook the Pork:

    • Cover and cook on low for 8-10 hours, or until the pork is tender and can be easily shredded with a fork.
    • Alternatively, you can cook on high for 4-6 hours if you're short on time.
  4. Shred the Pork:

    • Once the pork is cooked, remove it from the slow cooker and place it on a cutting board.
    • Use two forks to shred the pork into bite-sized pieces.
    • Return the shredded pork to the slow cooker and stir it into the sauce, allowing it to soak up the flavors.
  5. Assemble the Sandwiches:

    • Toast the hamburger buns lightly if desired.
    • Spoon a generous portion of the BBQ pulled pork onto the bottom half of each bun.
    • Top with coleslaw and pickles if using.
    • Place the top half of the bun over the pulled pork.
  6. Serve and Enjoy:

    • Serve the BBQ pulled pork sandwiches hot, with additional barbecue sauce on the side if desired.
    • Enjoy your delicious homemade BBQ pulled pork sandwiches!

 Bronx Lemon Pepper Chicken: A Flavor Explosion

Introduction

Bronx Lemon Pepper Chicken is not just another chicken recipe; it's a culinary delight that brings a burst of flavors with every bite. Infused with the tanginess of lemon and the spicy kick of pepper, this dish is perfect for any occasion. But what sets it apart is its unique Bronx twist, which adds a cultural and flavorful dimension that makes it truly special.


Ingredients Needed

Essential Ingredients
  • Chicken pieces (thighs, drumsticks, or breasts)
  • Fresh lemons
  • Ground black pepper
  • Olive oil
  • Garlic powder
  • Onion powder
  • Salt
Optional Ingredients for Added Flavor
  • Paprika
  • Cayenne pepper
  • Fresh herbs (parsley, cilantro)
  • Honey or sugar for a touch of sweetness

Preparation Steps

Preparing the Chicken
  1. Clean and pat dry the chicken pieces.
  2. Marinate with salt, garlic powder, onion powder, and olive oil for at least 30 minutes.
Making the Lemon Pepper Seasoning
  1. Mix fresh lemon juice, ground black pepper, and any optional spices.
  2. Let it sit for a few minutes to blend the flavors.

Cooking Instructions

Baking Method
  1. Preheat the oven to 375°F (190°C).
  2. Place the marinated chicken on a baking sheet.
  3. Bake for 25-30 minutes, or until the chicken is cooked through and golden brown.

Grilling Method
  1. Preheat the grill to medium-high heat.
  2. Grill the chicken for about 6-8 minutes per side.
  3. Brush with lemon pepper seasoning during the last few minutes of grilling.

Serving Suggestions

Ideal Side Dishes
  • Roasted vegetables
  • Mashed potatoes
  • Fresh green salad
Presentation Tips
  • Garnish with lemon slices and fresh herbs.
  • Serve on a platter with colorful sides for an eye-catching presentation.

Health Benefits

Nutritional Value

Bronx Lemon Pepper Chicken is rich in protein and essential vitamins. Lemons add a dose of vitamin C, while black pepper offers antioxidant properties.

Healthier Alternatives
  • Use skinless chicken for a lower-fat option.
  • Opt for grilling instead of frying to reduce calorie intake.

Popular Variations

Spicy Bronx Lemon Pepper Chicken

Add cayenne pepper or hot sauce to the marinade for an extra kick.

Herb-Infused Bronx Lemon Pepper Chicken

Incorporate fresh herbs like rosemary or thyme into the seasoning for a fragrant twist.

Tips for Perfect Bronx Lemon Pepper Chicken

Common Mistakes to Avoid
  • Over-marinating can make the chicken too salty.
  • Avoid cooking at too high a temperature to prevent drying out the chicken.
Expert Tips
  • Let the chicken rest after cooking to retain juices.
  • Use fresh lemon juice for the best flavor.

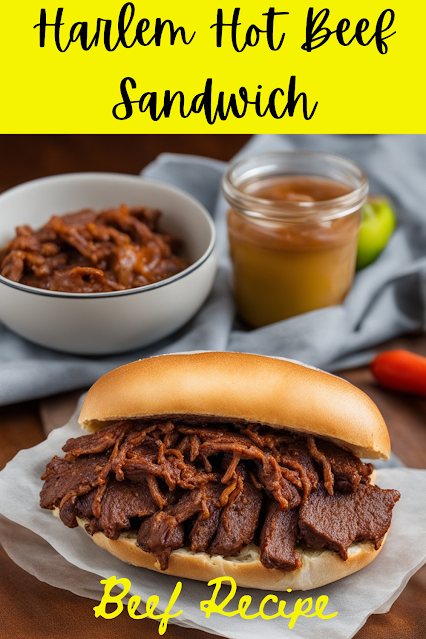
 Harlem Hot Beef Sandwich Recipe

Introduction

The Harlem Hot Beef Sandwich is more than just a meal; it’s a culinary experience steeped in rich history and vibrant culture. Known for its robust flavors and tender beef, this sandwich has become a staple in Harlem’s food scene. Whether you’re a long-time resident or a curious foodie, this recipe is your ticket to savoring a piece of Harlem’s gastronomic heritage.


The Origins of Harlem Hot Beef Sandwich

Understanding the origins of the Harlem Hot Beef Sandwich is essential to appreciating its significance. The dish dates back to the early 20th century, during the Harlem Renaissance, a period of cultural rebirth for African American arts and culture. This sandwich, like many other iconic dishes, was born out of necessity and creativity, using affordable ingredients to create something truly delicious and comforting.

Ingredients Needed

To recreate the Harlem Hot Beef Sandwich at home, you’ll need the following ingredients:

  • Main Ingredients:

    • 2 lbs of beef (chuck roast or brisket)
    • 4 sandwich rolls
    • 1 large onion, thinly sliced
    • 2 cups beef broth
    • 1 cup barbecue sauce
    • 2 tbsp Worcestershire sauce
    • 1 tbsp brown sugar
    • 1 tsp smoked paprika
    • Salt and pepper to taste
  • Optional Add-ons:

    • Pickles
    • Coleslaw
    • Jalapenos
    • Cheese slices

Choosing the Right Beef

Selecting the right cut of beef is crucial for achieving the perfect texture and flavor. Chuck roast and brisket are excellent choices due to their marbling and ability to become tender when cooked slowly. When selecting beef, look for cuts with a good amount of fat and marbling, as these will provide the most flavor.

Preparing the Beef

  1. Marinating Process:

    • Season the beef with salt, pepper, and smoked paprika.
    • In a bowl, mix together the barbecue sauce, Worcestershire sauce, and brown sugar.
    • Marinate the beef in this mixture for at least 2 hours, preferably overnight.
  2. Cooking Methods:

    • Slow Cooker: Place the marinated beef in a slow cooker, add the beef broth, and cook on low for 8 hours.
    • Oven: Preheat your oven to 325°F (160°C). Place the beef in a roasting pan, add the beef broth, cover with foil, and cook for 4-5 hours.
    • Stovetop: Sear the beef in a large pot, add the beef broth, cover, and simmer on low heat for 3-4 hours.

Creating the Perfect Sauce

The sauce is what elevates this sandwich from good to unforgettable. Here’s how to make it:

  1. In a saucepan, combine the leftover marinade, sliced onions, and a bit more beef broth.
  2. Simmer on low heat until the onions are soft and the sauce has thickened.
  3. Adjust the seasoning with salt, pepper, and a touch of sugar if needed.


Assembling the Sandwich

  1. Bread Selection:
    • Choose sturdy rolls that can hold up to the juicy beef and sauce. Kaiser rolls, hoagie buns, or even brioche buns work well.
  2. Layering Techniques:
    • Split the rolls and lightly toast them.
    • Pile on the shredded beef, ensuring it’s generously sauced.
    • Top with the softened onions from the sauce.

Adding the Toppings

Traditional toppings for the Harlem Hot Beef Sandwich include pickles and coleslaw. However, feel free to get creative with jalapenos for a spicy kick or cheese slices for added richness.

Serving Suggestions

Pair your Harlem Hot Beef Sandwich with classic side dishes like fries, potato salad, or a fresh green salad. For beverages, iced tea, lemonade, or a cold beer complement the sandwich perfectly.

Health Considerations

While this sandwich is undeniably delicious, it’s also quite indulgent. For a healthier version, opt for leaner cuts of beef, whole wheat rolls, and low-sugar barbecue sauce.

Tips and Tricks

  • Cooking Tips: Slow cooking is key to tender beef. Don’t rush the process.
  • Avoiding Mistakes: Don’t over-season the beef initially; you can always adjust the seasoning later.

 Creamy Garlic Shrimp Pasta: A Delightful Culinary Experience

Introduction

Who doesn’t love a plate of rich, creamy pasta? One dish that stands out is the Creamy Garlic Shrimp Pasta. This delightful meal combines the delicate flavors of shrimp with a luscious garlic-infused cream sauce, making it a favorite for many. Whether you’re cooking for a special occasion or a cozy dinner at home, this dish is sure to impress.


Ingredients Needed

To create this mouthwatering dish, you’ll need the following ingredients:

  • 1 lb of shrimp, peeled and deveined
  • 8 oz of fettuccine or linguine
  • 2 tablespoons of butter
  • 4 cloves of garlic, minced
  • 1 cup of heavy cream
  • 1/2 cup of grated Parmesan cheese
  • Salt and pepper to taste
  • Fresh parsley for garnish

Using fresh ingredients is key to enhancing the flavors of this dish. Fresh shrimp and garlic can make a significant difference in the final taste.

Preparing the Shrimp

Start by cleaning and deveining the shrimp. This ensures that you have clean, grit-free shrimp ready for cooking. Once cleaned, season the shrimp with a bit of salt and pepper. This simple seasoning helps to bring out the natural flavors of the shrimp.

Cooking the Pasta

Choose a pasta like fettuccine or linguine that can hold the creamy sauce well. Cook the pasta in salted boiling water until it reaches an al dente texture. This means the pasta should be firm to the bite, not too soft, to ensure it blends well with the sauce later.

Making the Creamy Garlic Sauce

The creamy garlic sauce is the star of this dish. Here’s how you make it:

  1. Melt the butter in a large skillet over medium heat.
  2. Add the minced garlic and sauté until fragrant.
  3. Pour in the heavy cream and bring it to a gentle simmer.
  4. Stir in the Parmesan cheese until the sauce is smooth and creamy.
  5. Season with salt and pepper to taste.


Combining Shrimp and Pasta

Add the seasoned shrimp to the sauce and cook until they turn pink and are cooked through, which usually takes about 3-4 minutes. Once the shrimp is done, add the cooked pasta to the skillet. Toss everything together until the pasta is well coated with the sauce.

Adding the Final Touches

For the final touches, garnish the pasta with freshly chopped parsley. This adds a touch of color and freshness to the dish. Serve the pasta immediately for the best taste.

Tips for the Perfect Dish

To ensure your Creamy Garlic Shrimp Pasta turns out perfectly every time, follow these tips:

  • Don’t overcook the shrimp: Shrimp cook quickly, and overcooked shrimp can become rubbery.
  • Consistency of the sauce: If the sauce is too thick, you can add a bit of the pasta cooking water to loosen it up.

Variations of the Recipe

You can customize this recipe in various ways:

  • Different pasta: Try using penne or spaghetti if you prefer.
  • Adding vegetables: Incorporate spinach or cherry tomatoes for added color and nutrients.

Health Benefits

Shrimp is not only delicious but also nutritious. It’s a great source of protein and contains important nutrients like selenium and vitamin B12. Garlic, known for its health benefits, can help boost the immune system and improve heart health.

Pairing Suggestions

This dish pairs wonderfully with a crisp white wine like Sauvignon Blanc or Chardonnay. For sides, consider a fresh green salad or garlic bread to complement the flavors.

Common Mistakes to Avoid

Avoid these common mistakes to ensure your dish turns out perfectly:

  • Overcooking pasta or shrimp: Both should be cooked just right to avoid a mushy texture.
  • Runny sauce: Ensure the sauce is creamy and not too runny by allowing it to simmer and thicken properly.

Storing Leftovers

If you have leftovers, store them in an airtight container in the refrigerator for up to 2 days. When reheating, do so gently over low heat to avoid overcooking the shrimp.

 Queens Tandoori Chicken

Tandoori Chicken, an iconic dish hailing from the Indian subcontinent, has garnered global fame for its rich flavor and unique cooking technique. In the heart of Queens, New York, Tandoori Chicken has found a special place, offering a delightful experience for food enthusiasts. Let's dive into the world of Queens Tandoori Chicken and explore what makes this dish so irresistible.


History of Tandoori Chicken

Tandoori Chicken's roots trace back to the northern regions of India, specifically Punjab. This dish was traditionally cooked in a tandoor, a cylindrical clay oven heated with wood or charcoal. The method of cooking in a tandoor imparts a distinct smoky flavor to the chicken, making it a beloved choice in Indian cuisine. Over the years, Tandoori Chicken has evolved, with various adaptations emerging across different regions.

Ingredients for Queens Tandoori Chicken

To recreate the magic of Queens Tandoori Chicken at home, you'll need:

  • Chicken pieces (preferably thighs and drumsticks)
  • Yogurt
  • Garlic and ginger paste
  • Lemon juice
  • Spices: cumin, coriander, turmeric, garam masala, red chili powder
  • Salt
  • Fresh cilantro for garnish

Preparation Process

Queens Tandoori Chicken Recipe

Step-by-Step Guide

  1. Marinate the Chicken: Mix yogurt, garlic, ginger, lemon juice, and spices. Coat the chicken pieces and marinate for at least 4 hours.
  2. Preheat the Oven/Grill: Set your oven or grill to the highest temperature.
  3. Cook the Chicken: Place the chicken on a rack or grill and cook for 25-30 minutes, turning halfway.
  4. Garnish and Serve: Garnish with fresh cilantro and serve with naan or rice.

Tips for Perfection

  • Ensure the chicken is well-marinated for maximum flavor.
  • Turn the chicken halfway during cooking for even charring.
  • Use a meat thermometer to ensure the chicken is cooked through.

Common Mistakes to Avoid

Overcooking

Overcooking can dry out the chicken. Keep an eye on the cooking time and use a thermometer to check for doneness.

Incorrect Spice Mix

Balance is key in the spice mix. Too much or too little of any spice can alter the flavor profile. Stick to the recipe proportions for the best results.

Variations of Tandoori Chicken

Regional Adaptations

Different regions have their takes on Tandoori Chicken, incorporating local spices and ingredients. Some variations include adding saffron for a royal touch or using coconut milk in the marinade.

Modern Twists

Modern recipes might involve baking the chicken in a conventional oven or using air fryers for a healthier twist. Fusion dishes like Tandoori Chicken tacos are also becoming popular.

 Empire State Steak Frites 

Introduction

Imagine a perfectly cooked steak, juicy and tender, paired with crispy, golden fries. This is the essence of Steak Frites, a dish that has captivated food lovers worldwide. Now, take that classic dish and add a New York twist—welcome to the world of Empire State Steak Frites. This unique variation brings the flair and flavor of New York to a beloved classic, making it a must-try for anyone visiting or living in the Empire State.


The Origin of Steak Frites

Steak Frites, meaning "steak and fries" in French, has its roots in French cuisine. This simple yet elegant dish became popular in brasseries across France and Belgium, where it was celebrated for its straightforward yet flavorful combination of tender steak and crispy fries. Over time, it crossed the Atlantic and found a new home in New York, where chefs began to put their own spin on it.

Choosing the Perfect Cut of Steak

The choice of steak is crucial for making Empire State Steak Frites. Popular cuts include ribeye, New York strip, and filet mignon. These cuts are favored for their balance of flavor and tenderness. Quality matters immensely, so opting for grass-fed, organic beef can elevate the dish to new heights.

  1. Ingredients:

    • Ribeye steak
    • Russet potatoes
    • Salt, pepper, garlic powder, rosemary
    • Olive oil
    • Butter
  2. Preparation:

    • Season the steak with salt, pepper, garlic powder, and rosemary.
    • Cut potatoes into thin strips and soak in cold water for at least an hour.
  3. Cooking:

    • Preheat the grill or pan. Cook the steak to desired doneness, then let it rest.
    • Fry the potatoes twice—first at 325°F until tender, then at 375°F until golden and crispy.
  4. Serving:

    • Plate the steak and frites together, and serve with your favorite sauce.


Health Considerations

While delicious, Steak Frites can be high in calories and fat. For a healthier version, consider using leaner cuts of steak and baking the frites instead of frying them. Incorporating a side of steamed vegetables can also add nutritional value to the meal.

 Instant Pot Beef Stew Dinner recipes Easy Dinner Recipe

Introduction

When the weather gets chilly, there’s nothing like a warm bowl of beef stew to comfort your soul. And with the Instant Pot, you can whip up this classic dish in a fraction of the time it takes using traditional methods. Instant Pot Beef Stew is not just about convenience; it’s about infusing rich, hearty flavors into every bite.


Ingredients Needed

Core Ingredients

  • 2 lbs of beef chuck, cut into 1-inch cubes
  • 1 large onion, diced
  • 4 cloves of garlic, minced
  • 4 carrots, peeled and chopped
  • 4 potatoes, peeled and cubed
  • 3 cups of beef broth
  • 2 tablespoons of tomato paste
  • 1 tablespoon of Worcestershire sauce
  • 2 teaspoons of salt
  • 1 teaspoon of black pepper
  • 1 teaspoon of dried thyme
  • 2 tablespoons of olive oil

Optional Ingredients

  • 1 cup of peas
  • 1 cup of corn
  • 1 cup of diced celery
  • Fresh parsley for garnish

Preparation Steps

Prepping the Ingredients

Start by gathering all your ingredients. Dice the onion, mince the garlic, and chop the carrots and potatoes into bite-sized pieces. Cutting everything evenly ensures that your stew cooks uniformly.

Setting up the Instant Pot

Ensure your Instant Pot is clean and ready to go. Have all your ingredients within arm’s reach to streamline the cooking process.

Cooking Instructions

Sautéing the Beef

  1. Turn on the Instant Pot and select the 'Sauté' function.
  2. Add olive oil and let it heat up.
  3. Add the beef cubes, searing them until browned on all sides. This step helps to lock in the flavors.
  4. Remove the beef and set it aside.

Adding Vegetables and Broth

  1. In the same pot, add the onions and garlic. Sauté until fragrant.
  2. Stir in the tomato paste and Worcestershire sauce, cooking for another minute.
  3. Return the beef to the pot and add carrots, potatoes, thyme, salt, and pepper.
  4. Pour in the beef broth, making sure everything is well combined.


Pressure Cooking Time

  1. Secure the lid on the Instant Pot and ensure the valve is set to 'Sealing.'
  2. Select the 'Pressure Cook' or 'Manual' setting and set the time to 35 minutes.
  3. Once the cooking time is complete, allow the pressure to release naturally for about 10 minutes before switching the valve to 'Venting' to release any remaining pressure.

Tips for the Perfect Beef Stew

Choosing the Right Cut of Beef

Opt for beef chuck as it becomes tender and flavorful during the cooking process. Avoid lean cuts, which can become tough.

Thickening the Stew

If you prefer a thicker stew, mix 2 tablespoons of cornstarch with cold water and stir it into the stew after cooking. Use the 'Sauté' function to bring it to a boil and thicken.

Adjusting Seasonings

Always taste your stew before serving and adjust the seasonings as needed. Sometimes a pinch more salt or an extra dash of pepper can make all the difference.

Serving Suggestions

Best Side Dishes

Serve your beef stew with crusty bread, mashed potatoes, or over a bed of rice. These sides help soak up the delicious gravy.

Garnishing Ideas

A sprinkle of fresh parsley or a dollop of sour cream can elevate the presentation and flavor of your stew.

Nutritional Information

Caloric Content

A serving of Instant Pot Beef Stew typically contains around 350-400 calories.

Macronutrients Breakdown

  • Protein: 25-30 grams
  • Carbohydrates: 20-25 grams
  • Fat: 15-20 grams

Frequently Asked Questions

How to Store Leftovers?

Store leftovers in an airtight container in the refrigerator for up to 4 days.

Can You Freeze Beef Stew?

Yes, beef stew freezes well. Place it in a freezer-safe container and store it for up to 3 months.

Reheating Instructions

Reheat your beef stew on the stovetop over medium heat until warmed through, or use the microwave, stirring occasionally.

Variations of Beef Stew

Experiment with different vegetables like parsnips, mushrooms, or butternut squash. You can also add a splash of red wine for a richer flavor.

Making Beef Stew Without an Instant Pot

If you don’t have an Instant Pot, you can make this stew on the stovetop or in a slow cooker. It will just take longer to achieve the same tender results.

Newer Posts Older Posts Home

ABOUT ME

"Discover the culinary magic at My Bella Recipe! Indulge in a world of mouthwatering recipes, cooking tips, and delightful food stories. Join our community of food enthusiasts and elevate your kitchen game today!"

SUBSCRIBE & FOLLOW

POPULAR POSTS

Categories

  • Beef Recipe 15
  • Chicken Recipes 37
  • Deliciously Easy Recipes 4
  • Dinner Recipes 21
  • Easy Recipes 3
  • Ground Beef Recipe 2
  • Home
  • About
  • Contact
  • Privacy Policy

Slider

4-latest-1110px-slider

Comments

4-comments
Bella  Recip
Powered by Blogger

Distributed By Gooyaabi | Designed by OddThemes

Report Abuse

Blog Archive

  • ▼  2024 (82)
    • ►  August (9)
    • ►  July (41)
    • ▼  June (32)
      • Central Park Pot Roast: A Hearty Family Meal Beef ...
      • Crispy Baked Fish Tacos Dinner Recies Easy Dinner ...
      • Chelsea Chimichurri Chicken A Flavorful Culinary D...
      • Vegetarian Stuffed Peppers Dinner Recipe Easy Dinn...
      • Fifth Avenue Fajita Chicken Easy Chicken Recipe
      • Bronx Beef Burritos A Culinary Delight Beef Recipe...
      • Central Park Chicken Salad Chicken Recipe Easy Chi...
      • Chicken Alfredo Bake Dinner Recipe Easy Dinner Recipe
      • Times Square Teriyaki Chicken Chicken Recipe Easy ...
      • Lower East Side Orange Chicken Easy Chicken Recipe...
      • BBQ Pulled Pork Sandwiches Dinner Recipe
      • Bronx Lemon Pepper Chicken A Flavor Explosion Chic...
      • Harlem Hot Beef Sandwich Recipe: A Flavorful Journ...
      • Creamy Garlic Shrimp Pasta: A Delightful Culinary ...
      • Queens Tandoori Chicken: A Culinary Delight Chicke...
      • Empire State Steak Frites, A Culinary Journey Thro...
      • Instant Pot Beef Stew The Ultimate Comfort Food Di...
      • Staten Island Chicken Alfredo
      • Manhattan Honey Garlic Chicken,Easy Chicken Recipe
      • Times Square Tacos Beef Recipe,Easy Beef Recipes
      • Lemon Butter Salmon Dinner Recipe,easy Dinner Recipes
      • Brooklyn BBQ Chicken Wings Chicken Recipes Easy Ch...
      • Spicy Honey Garlic Chicken Thighs Recipe Dinner Ideas
      • Brooklyn BBQ Brisket: A Culinary Journey Beef Recipe
      • NYC Classic Chicken Parm: A Culinary Delight Takin...
      • Manhattan Steakhouse Special: The Ultimate Beef Ex...
      • Creamy Garlic Chicken Recipe
      • Chef John's Buttermilk Fried Chicken easy chicken ...
      • Dooky Chase-Style Fried Chicken: A Culinary Delight
      • Easy Air Fryer Chicken Quesadillas Recipe
      • Red Wine-Braised Beef Tips
      • One Pan Chicken Gnocchi: A Flavorful and Convenien...

Search

Sections

  • Beef Recipe
  • Chicken Recipes
  • Deliciously Easy Recipes
  • Dinner Recipes
  • Easy Recipes
  • Ground Beef Recipe

Archive

  • Aug 20249
  • Jul 202441
  • Jun 202432
Logo

Boxed Version

  • Home
  • recentPostsHeadline

Pinterest

  • pinterest

About Me

My photo
Bella Recipe
View my complete profile

Labels

Beef Recipe 15 Chicken Recipes 37 Deliciously Easy Recipes 4 Dinner Recipes 21 Easy Recipes 3 Ground Beef Recipe 2

Labels

  • Beef Recipe (15)
  • Chicken Recipes (37)
  • Deliciously Easy Recipes (4)
  • Dinner Recipes (21)
  • Easy Recipes (3)
  • Ground Beef Recipe (2)
  • Home
  • About us
  • Contact us
  • Privacy Policy
  • Disclaimer

Trending now

Image
Easy Air Fryer Chicken Quesadillas Recipe
Easy Air Fryer Chicken Quesadillas Recipe Introduction: Craving a quick and delicious …
Image
Dooky Chase-Style Fried Chicken: A Culinary Delight
Dooky Chase-Style Fried Chicken: A Culinary Delight Introduction Dooky Chase's Restau…
Image
Red Wine-Braised Beef Tips
The Ultimate Guide to Red Wine-Braised Beef Tips Introduction Imagine walking into your k…
Image
One Pan Chicken Gnocchi: A Flavorful and Convenient Meal
One Pan Chicken Gnocchi: A Flavorful and Convenient Meal One-pan meals have become a go-…
Image
Bronx Lemon Pepper Chicken A Flavor Explosion Chicken Recipe Easy Chicken Recipe
Bronx Lemon Pepper Chicken: A Flavor Explosion Introduction Bronx Lemon Pepper Chicken i…

Popular Posts

Trending Articles

About Blog

"Discover the culinary magic at My Bella Recipe! Indulge in a world of mouthwatering recipes, cooking tips, and delightful food stories. Join our community of food enthusiasts and elevate your kitchen game today!"

Popular Posts

  • Garlic Butter Steak Bites Dinner Recipe, Easy Dinner Recipe
  • Greenwich Village Greek Chicken: A Culinary Delight Chicken Recipe
  • Spicy Taco Beef Skillet, Ground Beef Recipe

Labels

  • Beef Recipe 15
  • Chicken Recipes 37
  • Deliciously Easy Recipes 4
  • Dinner Recipes 21
  • Easy Recipes 3
  • Ground Beef Recipe 2